If you're not aware, half of the PoppySnaps team moved to Japan last August. Since then, I've been traveling, moving in, site-seeing, crafting, traveling, making new friends, learning a new language, traveling, and trying to keep up with the kidlets. It's been an amazing, if not ridiculously busy, year!
One thing people ask about when they hear I live in Japan is about the kind of house we live in, so I'm trying to put together a mini-series on our house. I can't explain how awesome this house is, so I'll mostly do it with pictures. Some things are very Western, but the Asian influence is definitely strong. Like having no oven!! But we'll get there.
Here is a peak into the kitchen.

We have a very open floor plan on the first level, so the dining area opens right into the kitchen.
One thing you might not notice at first is the lack of ANY built in cabinets. The only thing in the kitchen when we moved in was a fridge (we had to ask for that!) and the island. We got around the issue by buying a few pieces of furniture to help with storage.

My cookbooks are held up by a pot lid organizer from
Ikea. Can't go wrong for $5! And I never have to pick up falling books.

Here is a view of the island inside the kitchen.

Here is a tiny (but present!) dishwasher. I love that we have one. And it can surprisingly fit a lot into it.
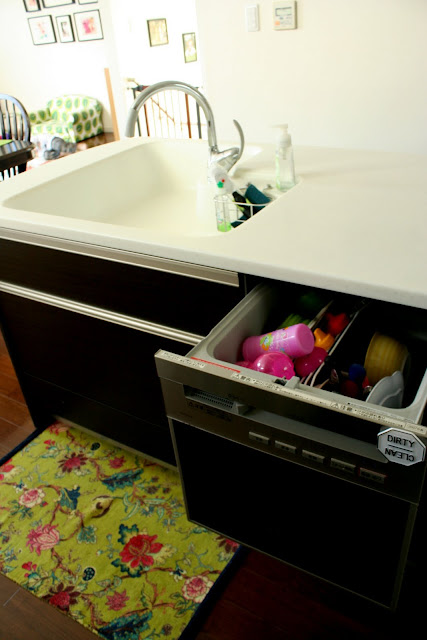
I got that kitchen rug at an adorable little shop in Taiwan during a trip, and it makes me happy every time I see it.
If you are familiar with Japanese bento boxes, then this kitchen will definitely make sense to you. Every flat surface on the island opens, giving a surprising amount of storage.

We can even fit all of our major countertop appliances (rice cooker, food processor, blender, toaster, etc.) in a drawer and tuck it away until we need it.
I LOVE this stove. If I could have one in every house we lived in, I would be one happy girl.
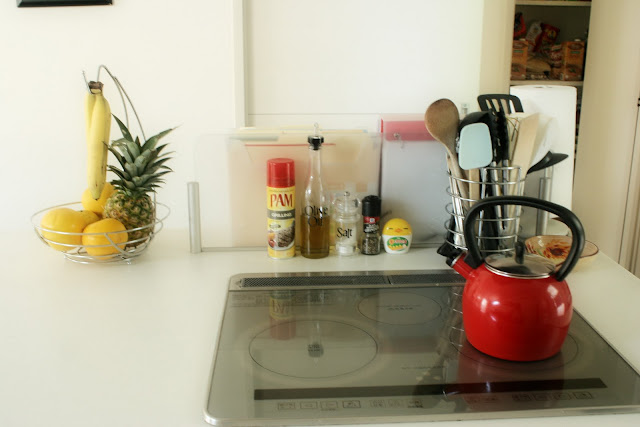
It is an induction stove. It only works with pots and pans that are magnetized. {which means we had a whole lotta pots and pans to get rid of when we first moved in!} It heats water to boiling in no time at all. And when you turn it off, the heat cuts off immediately giving the same effect as if you had taken the pan off the burner. AND, the burner never gets hot. Only the pan conducts heat, so right after taking a pan off, you can touch the burner without getting burned. Like I said, one of my favorite features.
Another amazing feature is this broiler/fish fryer.

You pop open the display next to it and tell it you want to cook a fish. Put a little water in the pan, and it cooks the fish to perfection EVERY time, I swear!
And now onto my not-so-favorite part. The above broiler is the only "oven" in the house. It's great for the functions it's supposed to do, but not the most amazing with the cookie making I sometimes try to make it do.
It's a really good thing that I *love* to cook and am not a big baker, because this would drive me crazy. I've been trying to get my Japanese speaking husband to get me a decent foreign voltage friendly toaster oven, but we're still in that process.
One thing I knew for sure when we moved in is that I wanted to have a paper sorting method. Paper seriously overtook our house in the last place! I wanted a good, sustainable solution. I came up with a small filing system and a paper holder to put papers until they were sorted.
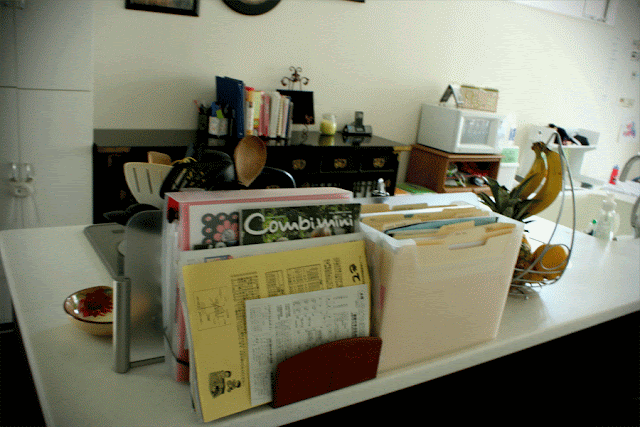
It doesn't look super amazing when you look right at it, but from this view (that you mostly see), it's barely visible.

Which I love.
Another huge project for me was figuring out how to organize an open pantry. I love the idea of glass jars and writing. Here's how mine turned out.
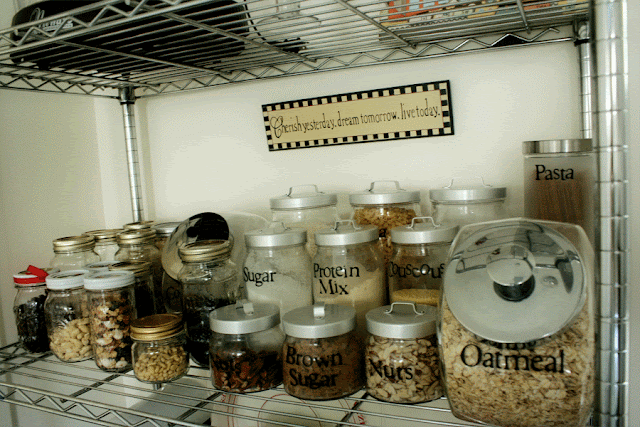

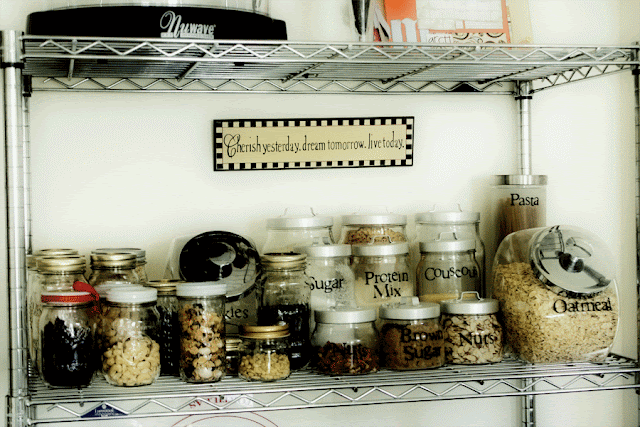
More lettering.

The open pantry.
I've still got plans for this baby, but right now I'm quite happy with it. Do you see the can organizer down there? It's awesome!
Hope you've enjoyed my virtual kitchen tour. And hopefully I'll be posting more in the Japan house series.
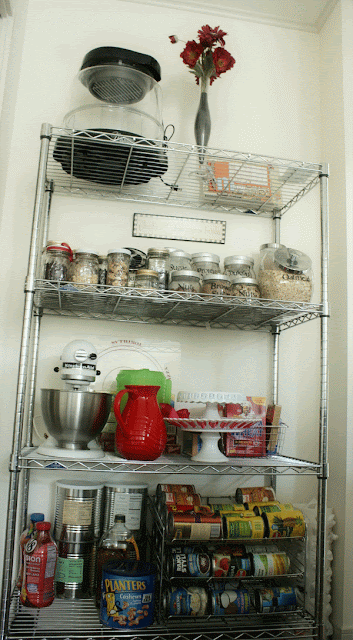
Here's a little teaser from my living room.

And don't forget to check out our inventory for PoppySnaps at our website.
Click here to enter the shop!oh, and linking to this linky party:


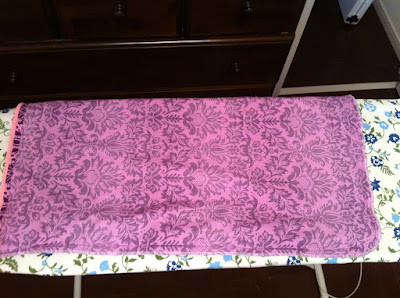
 I'm going to share a little of how I made it, mostly in words with a few pics thrown in.
 After I stitched it on, I added the next ruffled row underneath the bottom of the top row so that the stitching couldn't be seen.
 For the first couple rows I pinned and then sewed.
 At the top, I stitched on a bit of ribbon to cover up the top ruffle layer's unfinished hem.
 I'm not going to lie. It was a pretty tedious project after awhile. (Read-repetitive!!)


